
The feeling of shipping a code is great. But if the code is never executed for users, then it is no more than a (digital) waste product. To prevent this, modern software developers ship functionality to their users in short iterations and small increments. This is where CI CD Pipeline comes into the picture.
Continuous Integration and Continuous Deployment or CI-CD Pipeline is a way to ship code in small increments and iterations. In this learning tutorial we will describe how to quickly set up a simple & modern CI-CD Pipeline from scratch just by using few freely available hosted services.
Requirements For Setting Up CI CD Pipeline
- Basic knowledge of Python and Docker
- A GitHub account(free). GitHub is a web-based hosting service for version control using Git.
- A Travis CI account(free).Travisis a hosted service for Continuous Integration work. It’s free for public GitHub repositories.
- A Docker Hub account(free). It is a service provided by Docker for finding and sharing container images with other users.
- A Heroku account(free). Heroku is a cloud platform like Amazon Web Services(AWS,)to host your application.
- A Slack account(free). It is a cloud-based set of proprietary team collaboration tools and services.
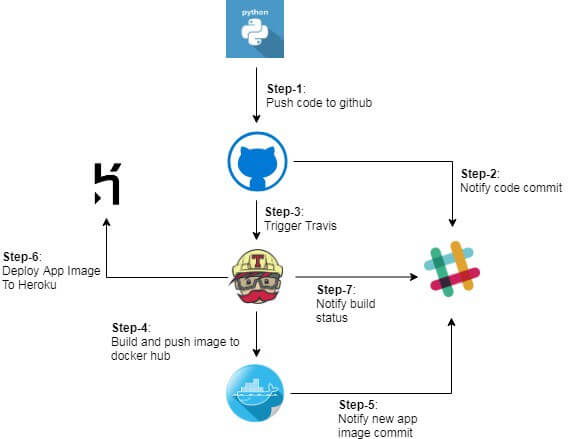
CI CD Pipeline Setup Overview
The overall workflow for setting up a complete CI-CD pipeline is divided into the following steps:
- Write a Python Web Application.
- Push the code to GitHub.
- Setup Travis CI to continuously run automated test.
- Create a Docker image for the web application.
- Push Docker image to Docker Hub.
- Deploy Docker image to Heroku.
- Notify deployment status on Slack.
Now let me explain in detail how each of the above steps are configured and linked with each other so that we have a fully functional modern CI-CD pipeline.
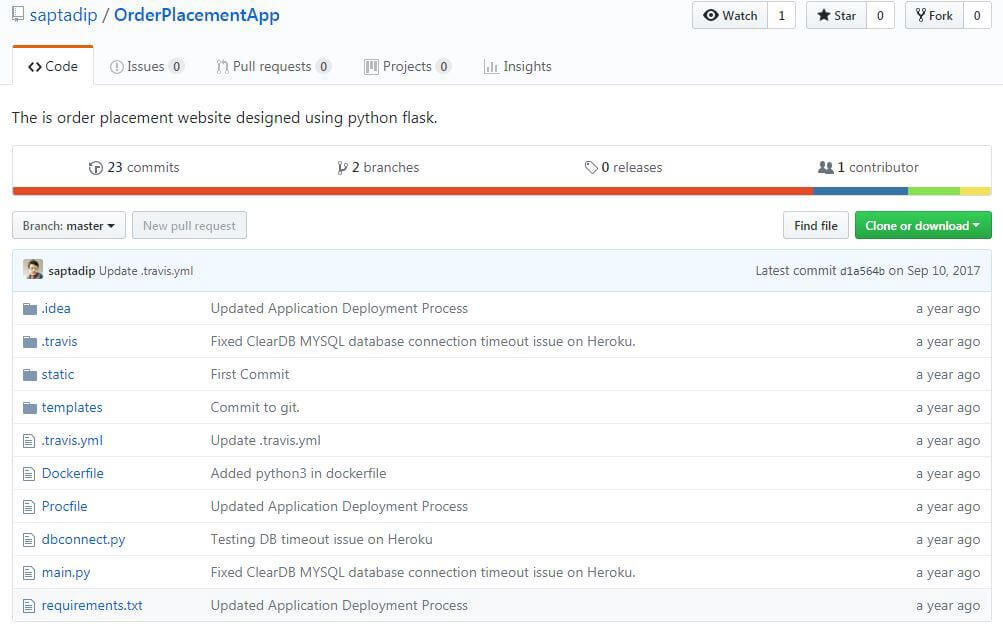
The complete code is available in GitHub under this link.
Step-1: Write A Web Application In Python
Let’s build a small “Order Placement” web application using Python Flask Framework. Flask is a micro web framework written in Python which is classified as a micro-framework because it does not require particular tools or libraries.
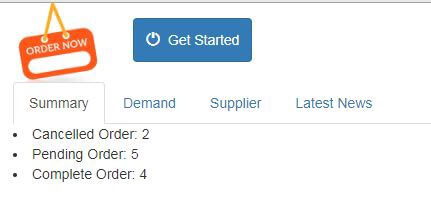
Our application is a very simple one as our main objective is to learn the basics of a CI-CD pipeline, NOT building a feature rich python web application. On the landing page of our web application, when you click on the “Get Started” button, the application displays different types of order count under “Summary” tab, by querying a back-end MYSQL database which is running on Heroku.
Below are the screen shots of different pages of our web application.

As mentioned earlier, the application has been developed using Python Flask Framework standards. Explaining the Python Flask Programming model is beyond the scope of this tutorial; however for the convenience of the beginners, we will briefly explain the important parts of the program.
On your local machine, clone the below GitHub repository:
https://github.com/saptadip/OrderPlacementApp.gitusing the git clone command:
git clone https://github.com/saptadip/OrderPlacementApp.gitIn case git is not already installed on your system, then use the below command(for Ubuntu) to install the package:
sudo apt-get update
sudo apt-get install git
After the repository is successfully cloned on your system, verify that the below directory structure is present:
d3f3@:~/OrderPlacementApp$ ls -latr
total 24
drwxrwxr-x 7 user root  281 Dec 25 19:55 ..
-rw-r--r-- 1 user root   43 Dec 25 19:55 requirements.txt
-rw-r--r-- 1 user root 1154 Dec 25 19:55 main.py
-rw-r--r-- 1 user root  383 Dec 25 19:55 dbconnect.py
-rw-r--r-- 1 user root   22 Dec 25 19:55 Procfile
-rw-r--r-- 1 user root  472 Dec 25 19:55 Dockerfile
-rw-r--r-- 1 user root  302 Dec 25 19:55 .travis.yml
drwxr-xr-x 2 user root   57 Dec 25 19:55 .travis
drwxr-xr-x 3 user root  111 Dec 25 19:55 .idea
drwxr-xr-x 6 user root   73 Dec 25 19:55 static
drwxr-xr-x 2 user root   64 Dec 25 19:55 templates
drwxr-xr-x 8 user root  163 Dec 25 19:55 .git
drwxr-xr-x 7 user root  189 Dec 25 19:55 .
d3f3@:~/OrderPlacementApp$
Now let’s explore some of the important files. Don’t worry if we skip some of the files from the explanation. We will explain them in the later part of this tutorial.
- The main program file is
main.pythat contains the python flask application code. - The database connection string is defined inside
dbconnect.pyfile. - The HTML templates are defined under:
templates/dashboard.html
templates/header.html
templates/main.html- All the static files like css, images, javascripts etc are stored under:
static/css
static/js
static/images
static/fonts
So our application code is now ready to be committed to ‘your’ GitHub repository.
Step-2: Push Your Code To GitHub
Create an account in GitHub first, if you don’t have one already. Then login to your account on GitHub and create a public repository called “OrderPlacementApp”.
Now it’s time to initialize Git locally and push your code to GitHub:
[OrderPlacementApp] $ git init
[OrderPlacementApp] $ git add *
[OrderPlacementApp] $ git commit -m "Initial commit"
[OrderPlacementApp] $ git remote add origin git@github.com:<YOUR_GITHUB_USERNAME>/OrderPlacementApp.git
[OrderPlacementApp] $ git push -u origin master
If the last command above complains about access rights, make sure you add your SSH key to your GitHub account.
You can enable Slack notification on you GitHub repository to automatically send a notification to your slack channel when a push or commit a new code. The detailed process of how to setup slack notification will be described in Step-7. A sample slack notification message is shown below:

Step-3: Connect Travis CI To Run Automatic Build On Every Commit
Enabling Travis CI to start a build at each Push and Pull request for your GitHub repository consist of TWO parts:
The FIRST step is quite simple. It is just about flipping a switch in your Travis account which is in front of your GitHub ‘OrderPlacementApp’ repository, as shown below:

After login to your Travis account, in case you do not see your GitHub repository listed, then click on the ‘Sync account’ button as shown below:

The LAST step of activating Travis CI is to add a file called “.travis.yml” in the root of your project directory. For our Order Placement Application, this file contains:
sudo: required
services:
  - docker
language: python
python:
  - "3.5"
script:
  - sh .travis/deploy_dockerhub.sh
after_success:
  - sh .travis/deploy_heroku.sh
notifications:
    slack: SLACK-USERNAME:SLACK-TOKEN
The above file is written in YML format. So basically whenever you commit your code in GitHub repository, Travic CI automatically detects the change and starts executing the tests that are pre-defined in ‘.travis.yml’ file. In this way you can often discover very quickly if your commit broke something, and fix it before it becomes a problem.
Note that in ‘notification’ section, you have to add your own Slack Username and your Slack channel specific token. We will later explain in Step-7 how to generate this token by using “Travis CI” application, available in Slack App Directory.
Now add the file to Git, then commit and push your changes:
[OrderPlacementApp] $ git add .travis.yml
[OrderPlacementApp] $ git commit -m "Add Travis CI configuration"
[OrderPlacementApp] $ git push
Go to the Travis CI dashboard. After a short amount of time Travis should notice your code changes and start the build/test process.
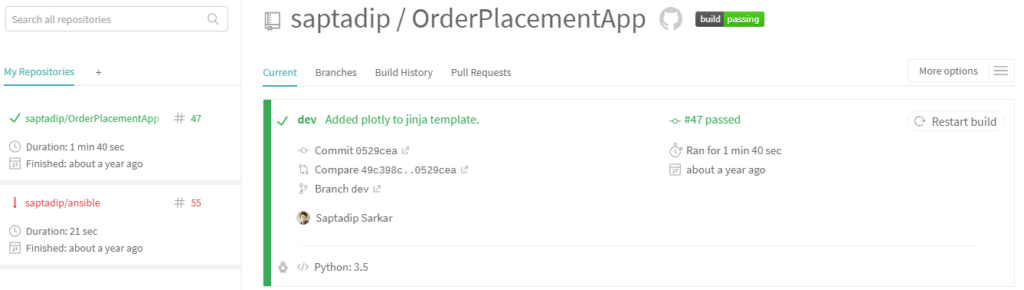
The output log shows the execution of the unit-tests/builds:

Step-4: Create A Docker Image For The Web Application
This part is already defined inside ‘.travis.yml’ file under the below section:
script:
  - sh .travis/deploy_dockerhub.sh
When shell script deploy_dockerhub.sh runs, it first login to your personal Docker Hub repository using these three variables: DOCKER_EMAIL, DOCKER_USER & DOCKER_PASS. These variables are stored as environment variables in Travis CI. You can access the environment variable section by clicking on “Settings” tab under your repository in Travis CI, as shown below:


The script then builds the docker image using the command docker build and a file called “Dockerfile” which is located at the root of our project directory.
Below is the docker image build command:
docker build -f Dockerfile -t $MY_DOCKER_REPO:$TAGA “Dockerfile” is a text document that contains all the commands a user could call on the command line to assemble an image. For our python flask application, we have used the below commands in our ‘Dockerfile’:
FROM alpine:3.6
RUN apk add --no-cache python3 && \
    python3 -m ensurepip && \
    rm -r /usr/lib/python*/ensurepip && \
    pip3 install --upgrade pip setuptools && \
    if [ ! -e /usr/bin/pip ]; then ln -s pip3 /usr/bin/pip ; fi && \
    rm -r /root/.cache
COPY requirements.txt /src/requirements.txt
RUN pip3 install -r /src/requirements.txt
COPY main.py /src
COPY dbconnect.py /src
COPY static /src/static
COPY templates /src/templates
CMD python3 /src/main.py
The commands described above in the ‘Dockerfile’ actually does the below four things:
- Install
python3andpip3packages. - Install the application dependency packages as listed in the file
requirements.txt. This file is located at the root of your project directory. - Copy all the application binaries and static files.
- Defines the command to launch the application.
So when the script deploy_dockerhub.sh executes the docker build command, it instructs docker to use the ‘Dockerfile’ to build the application image using the commands described in the ‘Dockerfile’.
Step-5: Push Your Docker Application Image To Docker Hub
This part is again defined inside ‘.travis.yml’ file under the below section:
script:
  - sh .travis/deploy_dockerhub.sh
The script deploy_dockerhub.sh uses docker push command to push the newly built docker image to your Docker Hub repository, as shown below:
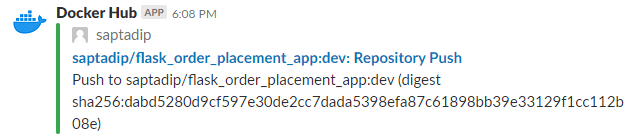
docker push $MY_DOCKER_REPOYou can enable slack notification in Docker Hub so that you can receive a notification each time a new docker image is pushed to your Docker Hub repository. We will explain this process in Step-7 later.
A sample slack notification from Docker Hub is shown below:
Step-6: Deploy The Docker Application Image To Heroku
Finally it is the time to deploy our docker application image on Heroku. This part is again taken care by Travis CI as the process is defined inside ‘.travis.yml’ file under the below section:
after_success:
  - sh .travis/deploy_heroku.sh
Let’s check what the script actually does.
Basically the script first installs Heroku CLI and Heroku-Container-Registry plugin. Then it login to Heroku docker registry to push our newly built application image. Please note that all these installations are done by Travis as part of the build process on the Travis CI server, NOT on your local machine.
However for the script to work, we have to pass TWO parameters to Travis CI. They are: HEROKU_API_KEY and HEROKU_APP_NAME.
These two variables are stored as ‘environment variables’ in Travis CI, as shown below:

Now let’s see how do we get the values of the above two parameters.
First open a linux terminal(using PUTTY, for example) on your local machine(Ubuntu) and install Heroku CLI with the below command:
curl https://cli-assets.heroku.com/install-ubuntu.sh | shTo check if the Heroku CLI is successfully installed, run the below command to see the heroku cli installed version:
heroku --versionNow login to your Heroku account using the below command:
heroku loginFollow the instructions on the terminal to launch the Heroku login page in a browser. The login page will be similar to:
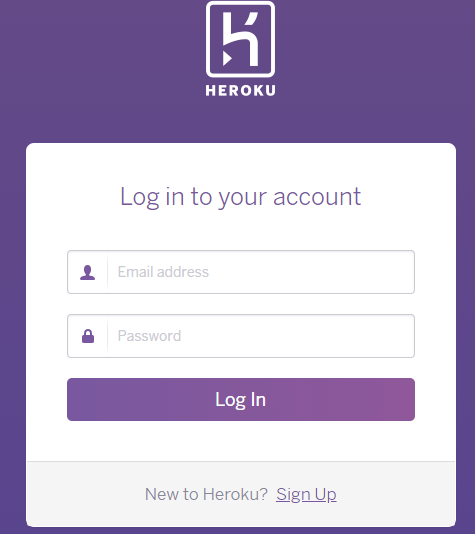
If you do not have a Heroku account, then click on ‘Sing Up’ to crate an account, which is free. If you already have an account then login with your credentials. If the login is successful, then you will see the below message on the linux terminal:
›
Logging in... done
Logged in as <YOUR_HEROKU_LOGIN_EMAIL_ID>
So now you have successfully login to your heroku account. It’s time to create our application.
The cli command to create a heroku application is:
heroku create sapta-order-placement-appHere we have used the application name as “sapta-order-placement-app”. Assign this value to the variable “HEROKU_APP_NAME” and store it as environment variable in Travis CI as mentioned earlier.
Once the app is created, you can see it in your heroku dashboard:

Now let’s create the heroku authentication token with the below command:
heroku auth:tokenCopy the token value, assign it to HEROKU_API_KEY variable and store it as a environment variable in Travis CI, as mentioned earlier.
So now we have stored all the necessary variables so that Travis can run the script deploy_heroku.sh
Points to Note
- Our application interacts with a back-end database server, so we have separately created a ClearDB MYSQL server on Heroku.
- We have to put a plain text file called “Procfile” at the root of the project directory which defines the entry point of our web application once it is deployed on Heroku platform. In other words, this file contains the command that is executed by Heroku after the application is deployed on its platform.
You can also enable slack notification so that you get an automatic message in your slack channel from Travis CI after the application is successfully deployed on Heroku.
A sample slack notification from Travis CI after a successful build is shown below:

Step-7: Configure Notification on SLACK
Slack is a very useful tool that is widely used at the enterprise level to collaborate with the team. You can very easily integrate slack at each step of your CI-CD process to notify your team about the deployment pipeline progress once a new code is committed to the repository.
In your Slack account page, go to “Configure App” section and search for the apps that we used so far. In our case, the apps are: Travis CI, Github & Docker Hub. Follow the on-screen instructions to setup the integration between Slack and these apps.
That’s all. Congratulation! You have successfully build your first CI-CD pipeline from scratch. Feel proud to share your achievements with friends and colleagues.